Friday, March 25, 2011

Ladies who Brunch

Every once in a while I feel the need to cook for more than just Mr bus driver man and the boy with braces. And who better to spoil than some of the women in my life! A couple weeks ago, I had the opportunity to do just that. A Sunday morning, an invitation, a yummy recipe and ta da! The Ladies who Brunch! was created.


What would brunch be without something sparkly to drink? And orange juice from a container with ducks on it??
Now, I generally live by the 80/20 rule of eating, which goes something like eating healthy 80% of the time and eating what I really want 20% of the time. Now, that kind of sounds like I don't enjoy eating healthy, which isn't true, but if we're being honest here, I LOVE LOVE LOVE the 20% sense of freedom and joy that still shows up!


Cinnamon baked french toast - a winner with the women!


Oh so happy that fondues are back in style!
That's not to say we didn't share some yummy healthy food because as you can see, we did (and in the world of Ladies who Bruch, it goes without saying that chocolate fondue is healthy)


But it wasn't really about the food. This was an opportunity for us all to feed ourselves on a spiritual level as well, sharing the company of women we love.

So glad to see my good friend Jen, who was in town visiting from San Francisco - impeccable timing on her part!
I was thrilled she could come and join the party.
Oh yes, the party was made complete with the addition of a baby!  
I know, a boy snuck in but he kept his face turned away from the camera so no one could tell he was there!
Now I test-drove a new recipe for the event, and told one of my friends I would never consider posting it on my blog (even though it was SO DELISH!! but not what I call healthy), given that this space is all about eating healthy. I got called out on that by the way. Apparently it fits my 20% criteria perfectly - I hadn't considered that before. So, without further ado, the recipe!

Cinnamon Baked French Toast
(adapted from The Pioneer Woman Cooks). This is a make-ahead (like the night before) recipe which makes it incredibly easy to prepare for company, or you know, you!

1 loaf bread (could be french, italian, sour dough, whatever you want)
8 eggs
2 ½ cups milk
½ cup sugar
2 tablespoons vanilla extract

Topping
½ cup flour
½ cup brown sugar
1-2 teaspoon cinnamon
¼ teaspoon salt
½ cup butter, cut into pieces
fresh fruit (optional)

Grease 9 x 13-inch baking pan with butter. Tear bread into chunks (or cut into cubes) and evenly distribute in the pan. Mix together eggs, milk, sugar, and vanilla. Pour evenly over bread. Cover tightly and store in the fridge several hours or overnight.

In a separate bowl, mix flour, brown sugar, cinnamon, and salt. Add nutmeg if desired. Add butter pieces and cut into the dry mixture until mixture resembles fine pebbles. Store in the fridge.

When you’re ready to bake the casserole, preheat oven to 350 degrees. Remove casserole from the fridge and sprinkle crumb mixture over the top. (If you’re using fruit, sprinkle on before the crumb mixture). Bake for 45 -55 minutes, until the top is golden brown.

Serve topped with butter, fresh fruit, plain yogurt and/or maple syrup (or all of the toppings). Or whatever you want - nuts and raisins are good too. My family wolfed down the leftovers plain and cold. Yup, it's that good!

Sunday, March 13, 2011

Quinoa Salad

Quinoa has become one of my favorite grains. It’s packed full of protein and once I got the hang of cooking it, I started to substitute it for rice and pasta in most of my cooking. This salad is easy to pack which makes it great for lunch at your desk (not that I advocate eating at your desk, but sometimes you do what you gotta do). And its super easy to make (now that I’ve figured it out, I’ll let you in on my secret)

Measure and rinse the quinoa. Rinsing the raw quinoa is important to take off the bitter resin-like coating (really important because otherwise it cooks up all glutinous and tastes pretty bad). Rinse it in a strainer with the finest grill you have. Quinoa is tiny so you can easily lose it down the drain if the holes in the strainer are too big.

Cook the quinoa in either a rice cooker or on the stove. I use a ratio of 1 cup grain: 1 ¼ cup water which I find is perfect. Cook until tender – about 15 minutes is all it takes. Put the quinoa into a large bowl and let it cool.


Prepare your veggies

Add them to the cooled quinoa along with the oregano and pine nuts (mmm, I think the pine nuts are the secret ingredient for this salad). Grind lots of pepper over the salad.

Put the oil, cider vinegar and lemon juice in the magic bullet and give it a whirl. Add it to the salad.


Mix it all up and then portion out some for lunch tomorrow before it all disappears. The flavours are really subtle but don’t be fooled. This salad packs a punch of good nutrition.

Quinoa Salad

1 cup quinoa, rinsed
1 ¼ cups water
½ cup grated carrot
¼ cup thinly sliced green onion
1 ½ tsp oregano
¼ cup pine nuts
1 tbsp extra-virgin olive oil
2 tbsp apple cider vinegar
2 tbsp lemon juice
Lots of freshly ground pepper

Put quinoa and water in rice cooker or medium sized pot. Cook until tender (about 15 minutes). Put cooked quinoa in large bowl and let cool. Add the carrots, onions, oregano, pine nuts and pepper. Mix oil, vinegar and lemon juice together and pour over salad. Mix it all together. Will keep in fridge for 2 or 3 days.


Thursday, March 3, 2011

Apple Pecan Muffins

I pretty much gave up eating muffins a while ago because for the most part, they really are just cake. And big pieces of cake at that! Cake that does damage to the waistline (the term "muffin top" was not a coincidence).

No this is not me!
 Not pretty!

Ok, now try to get that picture out of your mind while I tell you that today's recipe is actually healthy! Likely one of the healthiest (and yet tastiest) muffin recipes you will come across. And really, an occasional muffin isn't going to kill anyone (or even sabotage a weight loss plan) but people! The key is moderation. So here's what I'm going to suggest. When you make these (and you will), eat one fresh (no butter required!) and freeze the rest (or better yet, send them to school for the bake sale). These are a favorite with the boy with braces! And Mr bus driver man. He got a six-pack of these for his desert adventure.

So, let's start with some spelt flour. You can buy this at the store

 or you can grind your own.


Spelt grain can be purchased at most health food stores. If you don't have a grain grinder (and let's face it, how many of us do?) use a high speed blender to grind. I like to use my Magic Bullet if I'm in the mood to grind my own spelt. Make sure to grind it really really fine. You won't lose any of the nutrients but if the grain is course, you will have very heavy muffins. Which translates to almost inedible, and if you are treating yourself to something yummy and nutritious like this, you don't want to be eating something classified as "almost inedible." Really. Trust me on this one.

Once you've sorted out your spelt flour (to grind or not to grind...), throw it in a bowl and add in some brown sugar (yes, I said sugar), some ground flaxseed (have you invested in a magic bullet yet? Can you see a theme here?), some cinnamon, the usual culprits baking powder and his sidekick soda and a bit of sea salt.

Don't forget some fresh ground nutmeg. 
Have you met my little nutmeg man yet? I use him exclusively for grating fresh nutmeg. There's nothing like fresh nutmeg, especially if you grew up eating stale nutmeg (sorry Mom, you were an awesome cook and baker but your spice cupboard was um, how shall I say this? Hmmm, why did I start down this path...nothing good can come from it I am sure). Anyway, back to nutmeg. I used to wonder what the point was. It was quite revolting. But fresh nutmeg?? It's a completely different animal! Or nut! Ok, ok. back to work here.

Look where he stores his nuts.

Alright, enough oggling the nutmeg man.

Get out your knife and chop some apples into little bits like this.

Add in some vanilla, milk, yogurt, an egg and some broken pecans.


Mix it all up with a wooden spoon.  Then add it to the dry bowl.

I love these action shots!

Mix until the wet and dry have converged into a sodden mess and then spoon into a greased muffin tin. Now comes the extra special bit. Mix up a wee bit of brown sugar and cinnamon and a few more chopped pecans in a little bowl and spoon a little bit of this on top of your muffins. Mmmmm, yummy goodness is in store for you very very soon!

Oooh, blurry action shots! This is true photographic skill!
 
Bake in a slow oven. While they are baking (they take about 30 mins) make yourself a really good cup of coffee. Or tea. Your choice, But let the quality of the brew match what you are about to savour from the oven.
 
Let the muffins cool for a bit in the pan and then help them out by running a spatula around each muffin before gently lifting them onto the cooling rack. You do not want to tip these over and try to shake them out. Not unless you want sugar and cinnamon and tiny little pieces of nuts spread all over your counters, floor, etc. Get the picture?? No I didn't take one, I figured that out on my own, thank you very much!
 
The recipe - Apple Pecan Muffins

 (makes 12 muffins)

Ingredients

Dry:
2 cups spelt flour
¾ cup brown sugar
1/3 cup ground flaxseed
1 Tbsp cinnamon
½ tsp nutmeg
1 tsp baking powder
1 tsp baking soda
½ tsp sea salt


Wet:
1 ½ cups chopped apples (1 large apple usually is enough)
1 tsp vanilla extract
1 cup skim or 1% milk
½ cup plain yogurt
1 egg, beaten
½ cup broken pecans

Topping:
½ tsp brown sugar
½ tsp cinnamon
¼ cup chopped pecans

Instructions:
Preheat oven to 300°F. Spray your muffin pan. In two large bowls, separately mix dry and wet ingredients. Add wet ingredients to dry, stirring until just mixed. Spoon into muffin pan. Top each muffin with a sprinkling of topping mixture. Bake for 30 mins. Do the toothpick test to see if they are done.


Monday, February 28, 2011

Peanut Cinnamon Date Balls

Mr Bus driver man has headed south with a buddy for some serious guy time. This involves dirt, motorbikes, sunshine and more dirt. I suspect beer will be involved somehow as well.

Before he left he requested some healthy snacks to take with him. While I applaud his request, I think he is secretly looking forward to eating at those truck stops down the I5 (shudder).

At any rate, I took him at his word and sent him off with some apple pecan spelt muffins (recipe to come later this week) and these little energy balls. I found both recipes on fANNEtastic food, another foodie whose blog I follow.

This couldn't be any easier to make, although if your food processor is anything like my food processor, the ingredients will have to be encouraged to get back in the line of the blade every few seconds until they reach perfect pulverization.

Start by getting your food processor out of the back of the cupboard. Don't forget to grab the accessory box while you're there. Use your small bowl and blade if you are only making a single batch. You can easily double or triple this recipe which is a good idea because they pack easily and are perfect for hiking, camping, or even having in your car when you are on the go.

Throw all the ingredients into the bowl and start processing. My dates were really hard. Probably bought them during the last ice age (not the one we had last week but probably the one before that). I put them in a pot with a bit of water and let them cook for a bit. That softened them right up.


Oh, make sure the dates are pitted. Very important.

Process a bit and then using a spatula, push the ingredients down off the side of the bowl. Do this a few dozen times. Eventually they will look like this. Only not as blurry in real time.


Scoop them up into your hands and roll into little balls. Then scrape the yummy goodness of your hands and eat it.


Tada! One recipe makes 6 of these little guys, but each one is packed with peanut power. Don't eat these if you are allergic to peanuts.

The Recipe - Peanut Cinnamon Date Balls

3/4 cup pitted dried dates
1/2 cup peanuts (get the unroasted and unsalted if you can)
1 Tbsp oats
1/4 tsp cinnamon
1 tsp water (not needed if you soak the dates first)

Toss in the food processor and pulse until everything is all ground up and sticking together. Form into balls. That's it!

Sunday, February 20, 2011

Time for a flu shot

When I was a kid and driving my dad crazy with a cough or sniffles, he'd head to the kitchen and make me a hot whisky. I figure he would pretty much be arrested for doing that today but there's something to be said for how effective those old remedies were. That's what I thought this was when I tried out this recipe given to me by my friend The Good Food Dude. Mr bus driver man and his buddy were hanging in the man cave playing with motorbikes and sounding retchedly sick so I whipped up a batch and delivered 2 steaming hot mugs.

It's pretty easy to make and is worthy of turning your nose up at it and even making gagging noises if you are so inclined. But trust me, when you are sick of being sick and those off-the-shelf "remedies" haven't done a darn thing to make you feel better, give this one a whirl.

Start with these 3 basic ingredients


Slice the green onions and ginger root. Don't worry about peeling the ginger - you won't be eating it. Throw it all in a pot like this


Add the garlic. I like to press the garlic cloves but if you don't have a garlic press, well, it's probably not the end of the world if you diced it up really fine. But just this once. A garlic press is an essential tool in my kitchen and I think everyone should have one. A good one, not one of those crap plastic jobs. But I digress.


Add some water and boil for about 5 mins. Strain the mixture into a cup.


Add a heaping tablespoon of honey and stir it up.


 It loses its appeal as it cools so drink up while its hot.

The recipe - Flu Shot

3 green onions, chopped
2 cloves garlic, minced
1 T fresh ginger root, grated or chopped
2 cups water
2 teaspoons honey (unpasteurized if you got it)

Boil onions, garlic and ginger for 5 minutes in the water. Strain and add honey. Drink while hot!


Thursday, February 17, 2011

Tomato Chickpea Soup

It was a cold wet day today and I thought I would try making a new soup recipe for dinner. The bonus for me was it could be made in the slow cooker which meant I could throw it all together and just walk away. Then if someone catches me reading a book on my window seat I can tell them I’m busy cooking!


Start by dicing up some carrots and celery and put them in the crock pot.


Add the chick peas.  You can use dried beans and soak them overnight but I prefer to use canned beans. You just have to rinse them really well.

Add 4 cups of vegetable broth.

In a separate saucepan, heat some olive oil and add some minced garlic.


Stir in the cumin and paprika and heat for five minutes. Then add some raw sugar (we only have raw sugar in cubes so I tossed a couple in), bay leaves, tahini, salt, tomato paste and water. Stir it up to make a paste.
Pour the mixture over the beans and vegetable mix. Turn the heat to high and cook for two hours.

Turns out two hours isn’t long enough so use the crock pot only if you have all day. I didn’t ‘cuz I had to feed Mr bus driver man before he went to work so I finished cooking the soup in a big pot on the stove.


Once all the veggies were cooked, puree small amounts at a time in your blender until the soup is smooth and creamy. This is actually trickier than it sounds. Or at least a lot messier than I thought it would be.
It’s not a bad idea to start the blender off slowly and give it a little bit of air so some of the heat can escape.  Although the clean-up was enough to give someone a small heart attack, the finished product was actually pretty tasty. Mr bus driver man added some hot sauce to his bowl (of course).

The recipe

Ingredients
1 cup dried garbanzo bean sor 2 16 oz cans, drained and rinsed
6 ripe plum tomatoes (or 1 28 oz can of diced tomatoes if you can't find fresh)
2-3 large carrots, sliced in rounds
2 celery stalks, diced
2 cloves garlic
2 tsp cumin
2 tsp spicy paprika
2 large bay leaves
1 Tbsp raw cane sugar
1 Tbsp tahini
1 tsp salt
1 can tomato paste
4 Tbsp olive oil
2 Tbsp dried basil or 1/2 cup chopped fresh basil
2 Tbsp Braggs liquid aminos

Directions
Dice tomatoes, carrots and celery. Put in pot and add rinsed and drained beans, 4 cups water and 2 veggie cubes along with bay leaves, basil, salt, tomato paste, tahini and sugar. In a separate pan, heat olive oil on medium heat. Add diced garlic and brown in the oil. Stir in cumin and paprika and heat for 5 minutes. Add 1/2 cup hot water to the spice mix and stir to make smooth paste. Add to vegetables and beans. If using pot, bring to boil, simmer covered for an hour. If using crock pot, turn heat to high and cook for approximately 3 hours. Blend soup with blender stick or in batches in blender. Add Braggs and salt and pepper to taste.

Monday, February 14, 2011

You're awesome!


It's a cold morning here on the wet coast, and Mr Bus Driver man has just fired up his motorbike and headed off to work.

He woke up to find a little something special in the kitchen.


Yes, its a bottle of hot Awesome Sauce made right here at home (well, not my home, but the town of my home!) with a single chocolate heart (also not made here in my home). If ever there was a way to my man's heart, it's with hot sauce, and something delicious to pour it on.  He refrained from adding it to his toast this morning, but I fully expect to see him drizzling it over tonight's dinner. As you might have guessed, in our home Valentine's Day is not a serious holiday but a time for a little fun and an extra little gesture.


Except, the little gesture from him was quite a bit bigger than I expected. Mr Bus Driver man, you're awesome!


Happy Valentine's Day everyone!

Saturday, February 12, 2011

Turkey Chili

Despite the sunny days we had last week, winter has not yet loosened her clutches on us and continues to give us cold nights and rainy days. Which is a long way of saying it's still chili weather.


This recipe is courtesy of David Kirsch, The Ultimate New York Body Plan. It uses ground turkey which you can get from pretty much any butcher counter these days. Make sure to thaw the turkey if you’ve got some in the freezer. Cooking it from frozen makes it kind of tough and not so pleasant.

Mr bus driver man gave it a 6/5 score the first time I made this so we have it quite often in our house.

Start with melting some butter in a large saucepan. We cook with Paderno pots on a gas stove. Good quality pans with steady heat really helps turn out good food.
 
Add the turkey and season well with salt and pepper.
Cook the turkey for 2-3 minutes or until browned. Okay, turkey doesn’t really brown, it goes more gray but you get the idea.

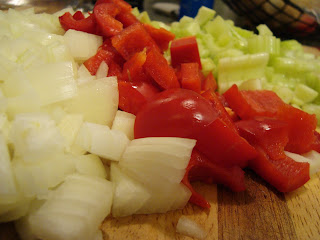
Put it in a bowl and set aside. Now chop up your veggies.

Throw them in the pan you just took the turkey out of, and add the garlic. You’ll want to add a bit more butter as well so the veggies can sauté on low heat.
Add your spices. I didn’t have any cayenne pepper so I used chili flakes instead.
(Did someone go a little wacko with the label maker? Trust me, when you have kids in the house, it helps to label EVERYTHING!)


Turn up the heat to medium and add in the tomatoes, stock and bay leaf. We had some kale in the fridge as well so I chopped some of that and threw it in.

Very pretty!


Bring the whole mess to a boil over high heat and then turn it down and let it simmer for about 15 minutes. Add the turkey and let it cook for another 5 minutes so the meat gets hot again. Don’t forget to take out the bay leaf before you serve it up.

 
Turkey Chili (the recipe says serves 4 but we only get 3 helpings in our house)


2 tsp butter, divided
1 lb lean ground turkey
Fresh ground salt and pepper to taste
1 cup coarsely chopped red bell pepper
1 medium onion, coarsely chopped (about ¾ cup)
2/3 cup coarsely chopped celery (about 1 stock)
1 clove garlic, minced
2 tsp chili powder
1 tsp paprika
1 tsp ground cumin
1/8 tsp ground cayenne pepper
14 ½ oz canned plum tomatoes
½ cup chicken stock
1 bay leaf

Heat 1 tsp butter in 3 quart saucepan over high heat. Add the turkey and season to taste with salt and pepper. Break up the turkey and cook for 2-3 minutes or until browned. Remove to a bowl and cover to keep warm.

Reduce heat to low, heat the other tsp of butter and cook the red pepper, onion, celery and garlic for 3-5 minutes or until the vegetables begin to soften. Add the chili powder, paprika, cumin and cayenne and cooking, stirring for one minute. Increase the heat to medium, add the tomatoes, stock and bay leaf. Bring to a boil over high heat. Reduce heat to medium-low and simmer uncovered for 15 minutes.

Add the turkey and simmer 5 minutes more. Remove and discard the bay leaf before serving.

Saturday, February 5, 2011

Calling a do-over


Remember when we were little kids and we could call a do-over, say if the ball fell out of our hand instead of throwing it hard like we intended? Or you tripped on your shoelace when you were in a skipping competition with your friends? Well, I'm calling a do-over on my blog.

My friend Jodi has been asking me when I'm going to update my blog (it's been oh, a few months since my last post) and I didn't have an answer. I knew I wanted to blog about something but really didn't know what I wanted to blog about. Well, now I do. After some thought about my dreams and passions, I saw what I really love is art, making a difference and cooking. Oh, and coaching people to reach their optimal health. Put all that together and I'm creating a blog on food. But not what we have come to call food in the 21st century, but REAL food, you know, the kind of stuff your grandma would recognize.

There are lots of really great food blogs already, I know. And I subscribe to a few of them and get really inspired by some of the recipes they post. So what's different about mine? Well, first I'm going to try and stick to few basic rules. Use real ingredients, keep the recipes simple, make sure they taste good and well, that's about it. Simple real yummy food. No calories to count, no nutritional breakdown, nothing more than something easy to make that will fuel your body in the way your body wants to be fuelled. I'll include some photos of the recipes as well (an added bonus for me - playing with my camera AND my food).

So, I'm collecting recipes, charging the batteries in my camera and getting out the pots and pans. Stay tuned...I've already got the first recipe picked out!